Close
After adding domain, the next step is to add the list of users, to whom the services need to be provisioned. The user services can be added one-by-one using the Web GUI or in bulk by uploading an Excel sheet. This section gives steps for adding users, one at a time, using Web GUI. The section Add User - Bulk gives steps to add multiple users at a time.
|
SL No |
Description |
|
1 |
Login to the control panel. |
|
2 |
List of domains will be displayed as follows  |
|
3 |
Select the domain in which you want to add users by clicking on the domain row. |
|
4 |
Click on View Users. That will display the following window  |
|
5 |
Click on Add New to add a user. That will bring up the following dialog 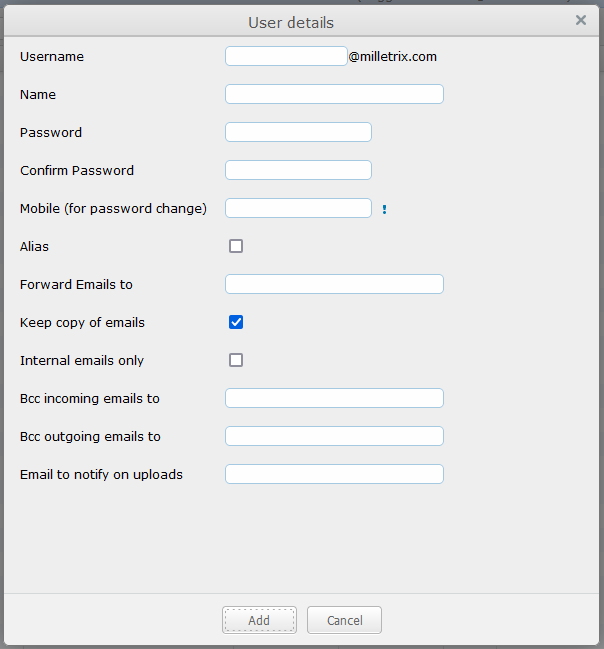 |
|
6 |
Enter the local part of Email address of the user in Username field. For example, in the above dialog, to create user info@milletrix.com, add info in Username field. |
|
7 |
Enter Name of the user (e.g., System Administrator) in Name field. |
|
8 |
Specify the password for user login in the Password and Confirm Password fields. Please note that certain HamaraCloud services like SecureMessaging and MessageVault do not require the user password field. In those cases, the Password and Confirm Password fields can be left empty. |
|
9 |
HamaraCloud offers users option to change their account password by entering an OTP sent to their Mobile number. If you want to enable this option, enter a valid Mobile number in the Mobile (for password change) field. The mobile number should be in the format +<CountryCode>-<MobileNumber>. An example of a valid number is +91-9382126757. |
|
10 |
HamaraCloud Email Storage Service supports concept of Email aliases. An email alias is an email address which does not have email storage associated with it. Emails sent to this address are simply sent to specified email addresses. For example,
|
|
11 |
To specify alias email address, click on Alias check box. That will change the dialog as follows:  |
|
12 |
Enter the email ID which the email id (to be added) is an alias of in Alias Of field. |
|
13 |
If the email address to be added is a normal email address (and not an alias address), its incoming emails can be forwarded to different email addresses. To forward the email address, specify the set of email addresses, it should be forwarded to, in Forward Emails to field. Multiple email addresses should be separated by , (comma). |
|
14 |
HamaraCloud supports two type of Email forwarding. The emails can be forwarded either by keeping a copy in the original mail box, or without keeping a copy in the original mail box. To forward by keeping a copy in the original Mail box, check Keep copy of emails field. To skip storing a copy of email when forwarding, uncheck Keep copy of emails field. |
|
15 |
HamaraCloud supports concept of Internal email addresses. These are email addresses that can only send / receive emails from the same domain. An internal email address cannot receive emails from other domains. To make an email address, internal, check Internal emails only field. Please note that this feature does not prevent Email address spoofing. To stop email address spoofing, you have to implement proper SPF and DKIM for the domain. |
|
16 |
HamaraCloud allows administrators to Bcc (Blind Carbon Copy) a users incoming or outgoing email to another email address. For example, all outgoing emails of info@milletrix.com can be Bcc'ed to infoout@milletrix.com, and all incoming emails of info@milletrix.com can be Bcc'ed to infoin@milletrix.com. In this case, whenever info@millletrix.com sends an email to outside, it will get copied to infoout@milletrix.com and whenever info@milletrix.com receives an email from outside, it will get copied to infoin@milletrix.com. This will happen without info@milletrix.com knowing about it. Kindly note that in case the delivery to the Bcc address fails (for any reason including exceeding quota), sender will get a bounce message and the Bcc mechanism might be exposed. |
|
17 |
To Bcc all outgoing emails of a user to a specified email address, enter the Email address in Bcc outgoing emails to field. |
|
18 |
To Bcc all incoming emails of a user to a specified email address, enter the Email address in Bcc incoming emails to field. |
|
19 |
HamaraCloud DocuStorage allows Administrators to receive a notification email whenever the user uploads a file using FTP / Web (  https://ftp.hamaracloud.com). To specify the email address which should receive the notification, enter the email address in Email to notify on uploads field. https://ftp.hamaracloud.com). To specify the email address which should receive the notification, enter the email address in Email to notify on uploads field. |
|
20 |
Click on Add button. The user will be added and will be displayed as follows in the Users table.  |
|
21 |
After adding all the users, proceed to Invoice Services section for adding orders and provisioning services for the users. |
If many users are to be added to the domain, adding using the Web GUI may be time consuming and inefficient. In that case, Administrators can upload a spreadsheet containing the required data and create the users. Follow these steps to create users in bulk.
|
Sl No |
Description |
|
1 |
Create a spreadsheet in your favorite office suite. |
|
2 |
Enter data for one user in a single row. |
|
3 |
For each row, the columns should have the following data. There should be no header row. The first row should contain data of first user. Second row, data of second user and so on... |
|
4 |
Column 1: username Contains the email address of the user. Required. |
|
5 |
Column 2: name Contains name of user. Recommended |
|
6 |
Column 3: password Contains password of user. Optional. Password is required only for Email Storage Service and Non-Email services. If you have passwords in another system and want to migrate the same to HamaraCloud, same can be done. For migration, you can take the Password hash from the old system and give in password field. HamaraCloud supports
|
|
7 |
Column 4: alias Specify email address this is an alias of. Optional. Has effect only if Domain has Email Storage Service. |
|
8 |
Column 5: fwdemail Specify the email addresses to which incoming email for this mail box should be forwarded to. Multiple email addresses should be separated by , (comma). Optional. Has effect only if Domain has Email Storage Service. fwdemail and alias cannot both be specified for same user. |
|
9 |
Column 6: internal If this is an internal email address, specify 1, if not specify 0. Optional. |
|
10 |
Column 7: recipientbcc Specify the email address all incoming emails of the user has to be Bcc'ed to. Optional. |
|
11 |
Column 8: senderbcc Specify the email address all outgoing emails of the user has to be Bcc'ed to. Optional. |
|
12 |
Column 9: uploadnotifyemail Specify the email address to be notified if this user uploads any document using FTP/Web. Optional |
|
13 |
Save the Spreadsheet in Excel 97-2003 Workbook (*.xls) format. |
|
13 |
Make sure that the spreadsheet does not contain more than 1000 rows. If you need to create more than 1000 users, create multiple spreadsheets of 1000 users each. |
|
14 |
Once you are ready with the spreadsheet, proceed further |
|
15 |
Login to control panel |
|
16 |
That will display the following:  |
|
17 |
Click on Bulk Operations. That will bring up the following window 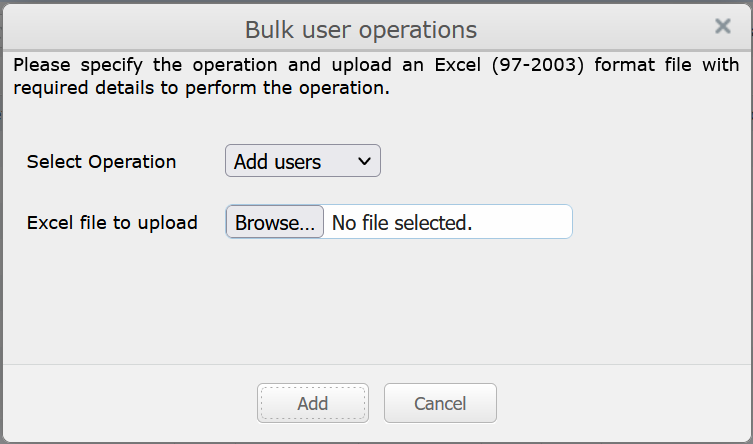 |
|
18 |
Make sure the Select Operation field has Add Users selected. Click on Browse... button. |
|
19 |
Select the spreadsheet you have created. Click on Add button |
|
20 |
The bulk addition job will be added to queue and following is displayed. 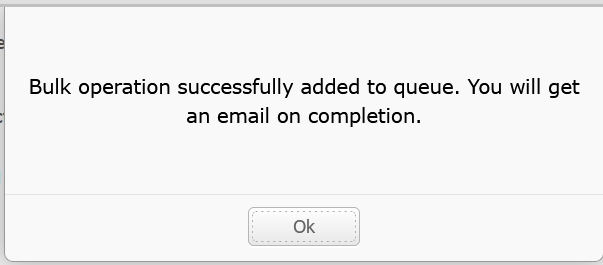 |
|
21 |
Click on OK. Old window will be displayed. Click on Cancel to close the Window. |
|
22 |
This operation will be completed in about an hour and on completion, you will get an email containing status of the operation. |
|
22 |
Proceed to Invoice Services section to create and provision orders. |
   |